Now that we’re back from our couple of days gallivanting in the Somerset countryside, I’d thought I’d write a quick post about what work we managed to do last weekend.
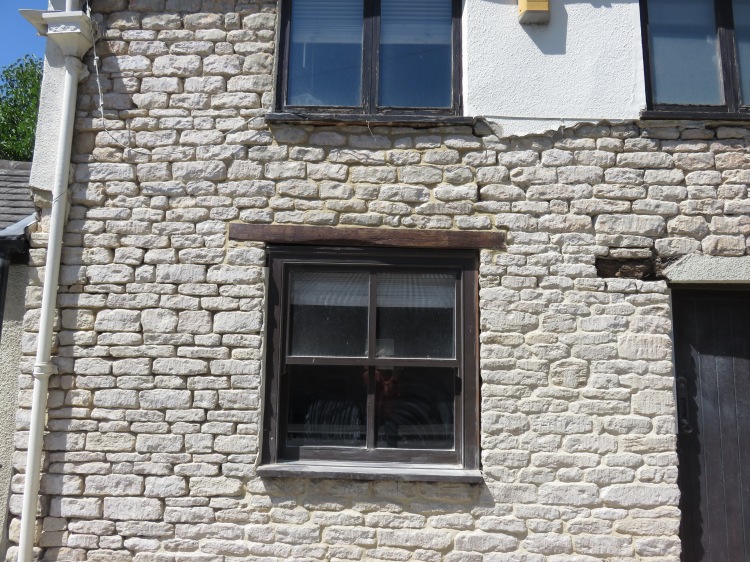
We were heading off on Sunday, so we tried to cram in as much as possible on Saturday. Our plan was to remove the old lintel over the lounge window, and replace it with one of the reclaimed ones. Here’s a quick before photo…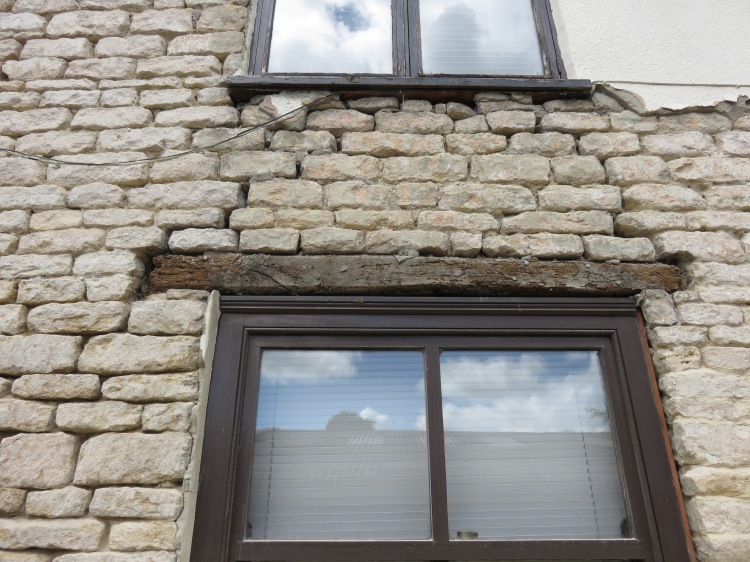 It’s not a great photo, but here you can clearly see the original, rotting lintel, along with the loose stonework above needing repair. To replace this lintel we would have to remove all of the stone above in order to lift it out, slide in the new lintel (after checking it’s size) and then re build the stones back in exactly the same place.
Sounds easy right?
This is the first time (of many to come, I’m sure) that I actually got quite nervous..
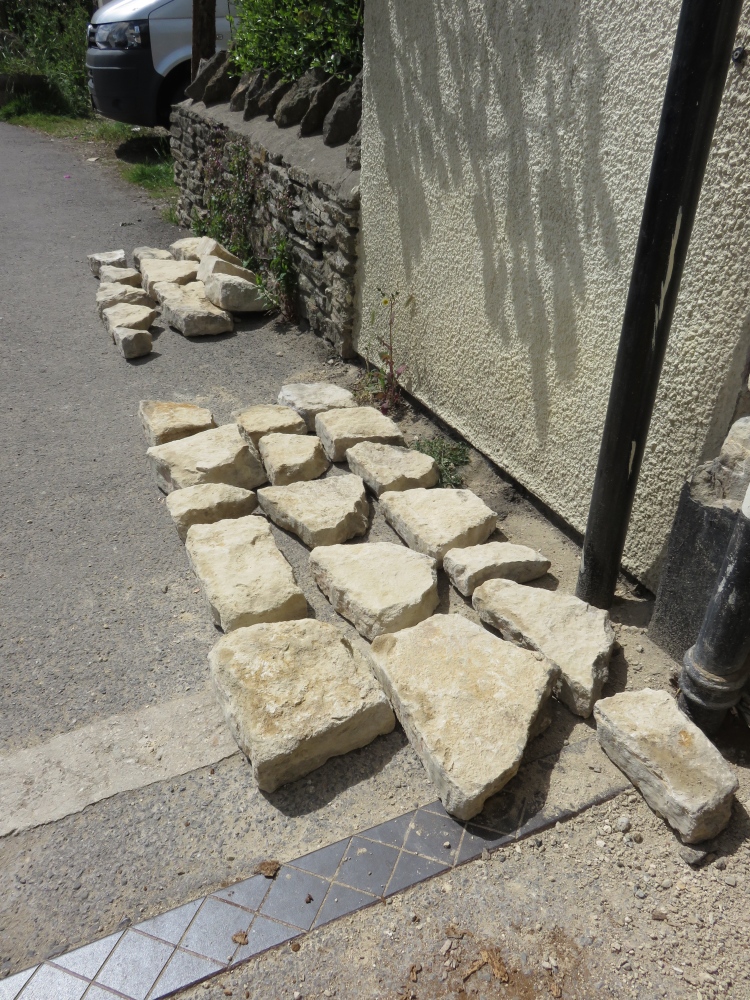
We started at the top underneath the window, removing the stones and lining them up on the floor below in numbered courses, so as to try and remember their exact place. We were removing the obviously loose stones, but as we were doing this there were quite a few more coming out with them. As long as we could leave a stone to support the window either side, the building would be ok..
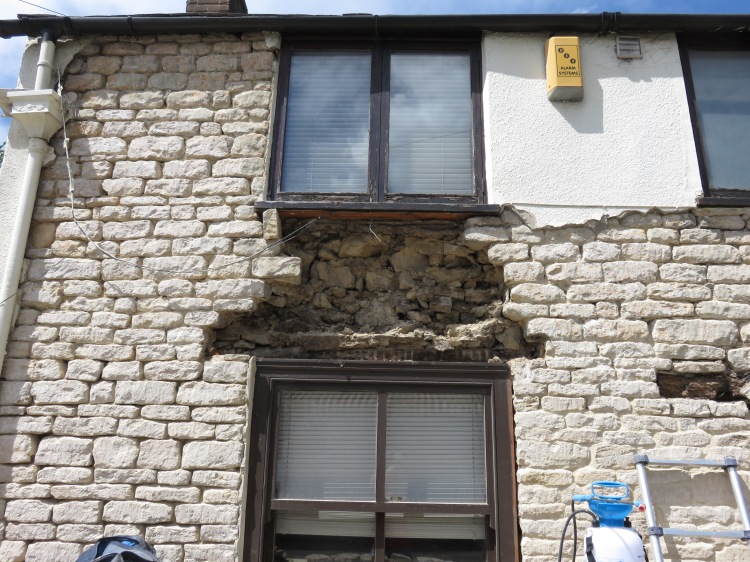
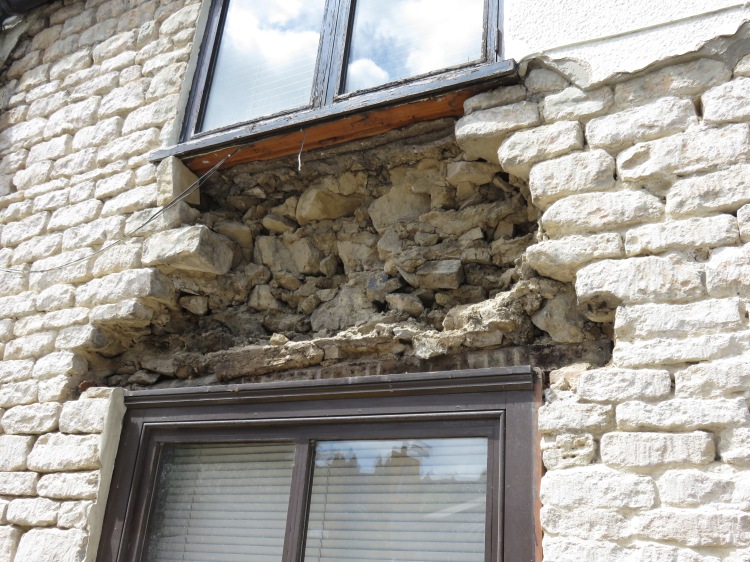
Once the stones were out, we could easily remove the original lintel. Here’s what we ended up with..
As you may be able to imagine, we had a fair few comments/looks from passers by as we were doing this! It was both exciting and extremely scary at the same time – I didn’t quite know how to feel. All we knew is that we needed to try and get the new one in, and the building built back up as soon as possible so that it was not without support for too long.
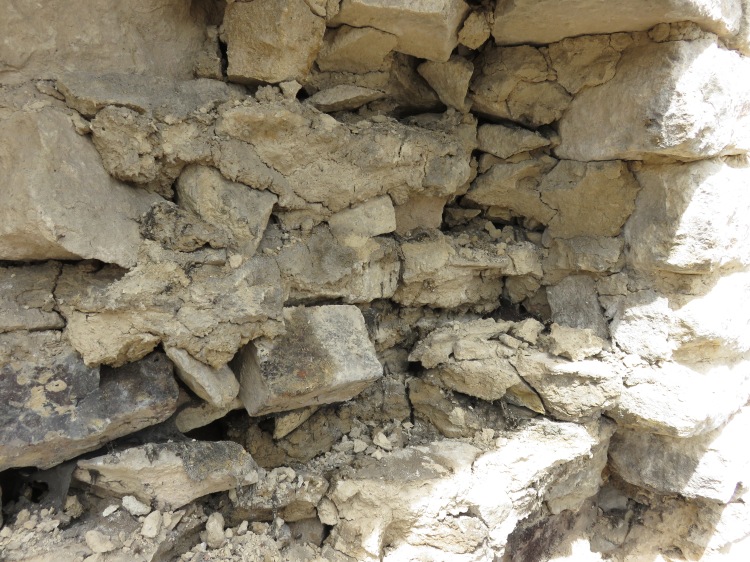
The above photo shows the original lintel removed, exposing the internal lintel. It also shows how the building has been backfilled, using huge amounts of lime, cement and more stone.
The removed lintel was in such a bad way, that every time you touched it more and more would disintegrate.
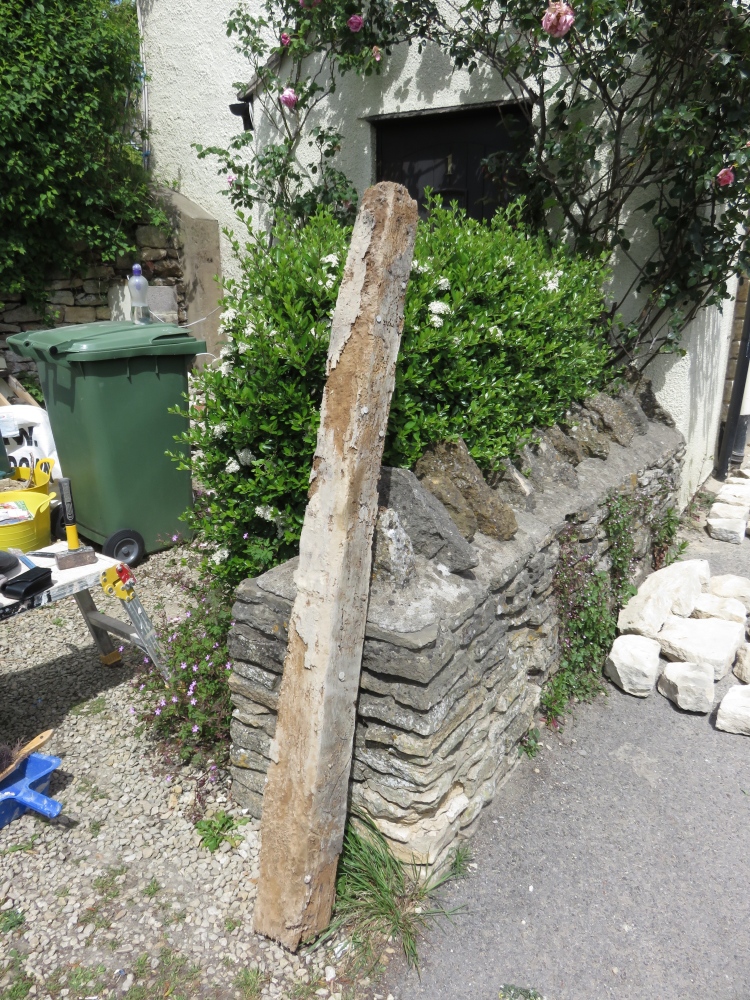
At this point, our lovely neighbour Anne brought us some much needed tea and cake ( thanks Anne!) We quickly polished it off and set about inserting the new lintel, along with repairing the masonry by building it back up again. It was quite tricky, as where it was a scorcher of a day the lime was drying out very rapidly. We were spraying the stones with water before we laid them, and also the recesses where we were laying. We removed all the loose parts of cement, lime and stone which had been used to backfill the building, and backfilled again with new lime and stones. We also had to point a few parts as we went along, so we got the desired finished.
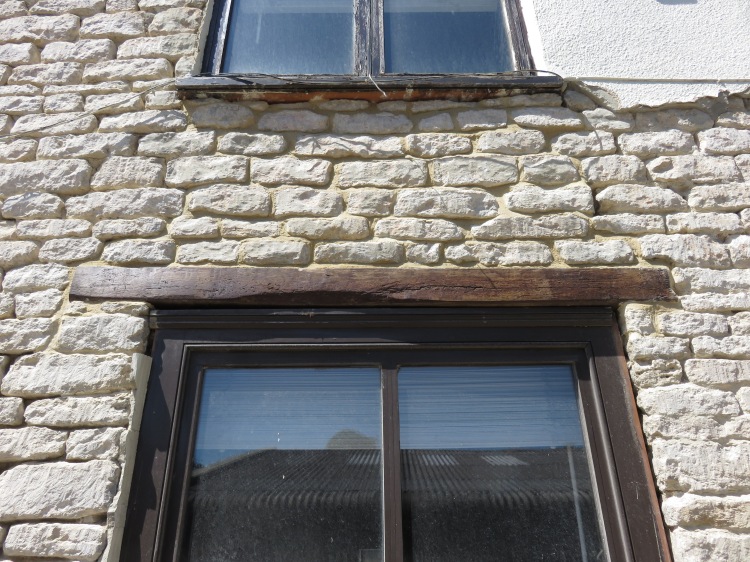
Over six hours went by as we were working on this one section, but it was worth it. We finished the pointing, and now the lintel looks fantastic, along with the repaired masonry.
We’re so pleased with the outcome of this, and we know the lintels will look even better when we get some new windows in. Also, now that we’ve re built our first section, hopefully I won’t be quite as scared when it comes to re building the rest!
After we’d completed this, we decided to do a few more repairs on the left corner where some stones were crumbling. We haven’t got round to pointing this section up yet, but can you spot the repairs?
We think these repairs blend in pretty well. Some are completely new stone replacements, and some we have managed to use the original stone by turning the face round (technically some of the building is now inside out!) We have also been able to create small stones to re use from some of the larger ones that crumbled.
We’re looking forward to pointing up this part of the building. It’s quite a large section, so should hopefully make quite an obvious difference when complete. We’ll be doing this next, along with replacing the lintel over the original door.
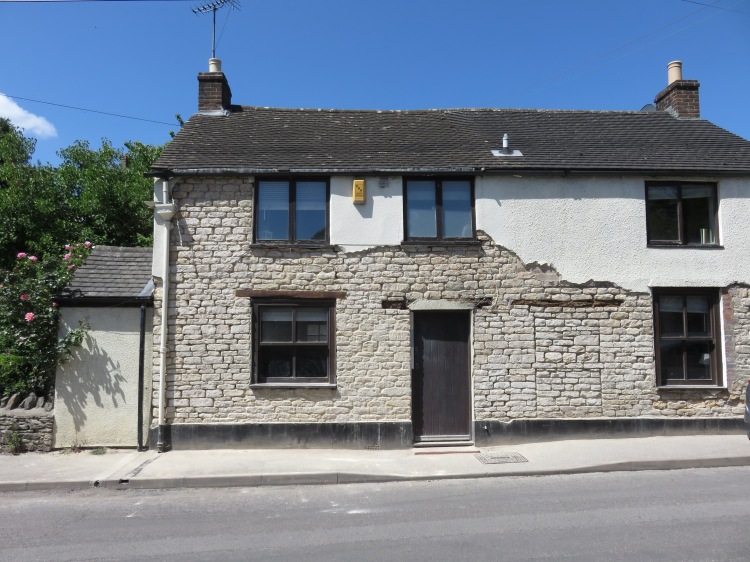
Here’s an up to date image of the cottage!
Now that I’ve finished rambling, I’d like to say a big thank you for all your positive feedback. It really helps us get out there and carry on when we feel like crashing in front of the tv after a long week at work.
We’d love to know your thoughts, and as always if you have any questions feel free to ask!

If you get a chance there’s a reclaimation yard near Exeter that’s worth visiting, Fagins Antiques, Hele, EX5 4PW. It’s enormous, probably has a website. Keep up the good work
LikeLike
Oh lovely, thanks Ric! If we’re ever down that way we’ll pop by!
LikeLike
The new lintel looks so much better, sturdier and stable; it also looks like a lovely piece of timber too. Your project is one of the most exciting blogs I’m reading at the moment – I can’t wait for the next post 🙂
LikeLike
Ahh thanks so much! That really means a lot, especially as though this is my first foray into blogging! You’re right, It’s definitely much more stable now, and re-building the section above has helped enormously. Yes, they are fantastic lintels. We picked them all out ourselves to guarantee lovely pieces!
LikeLike
Also- any tips would be greatly appreciated! 🙂
LikeLike