This weekend we concentrated on getting the bottom half of the cottage render free.
It was pretty tough in (most) places- apart from around the windows and towards the bottom where the render was damp. The cement was stronger and thinner in places, which gave us less to work with and to get behind. We’ve felt as if the house took a bit of a beating, but it has been worth it….
Before I go any further, we’d like to say a massive thank you to the people of Wotton for being so kind this weekend. There have been so many people offering to lend us tools, giving us information on the history of the property and exchanging kind words about our work. It’s been great to hear that everyone is just as excited and interested by what we are doing as we are ourselves, and that so many people admire us for putting in the effort to bring this building back to it’s original state. We’ve felt so much support this weekend in a place where we hardly know anyone, and it’s been fantastic. Thank you Wotton.
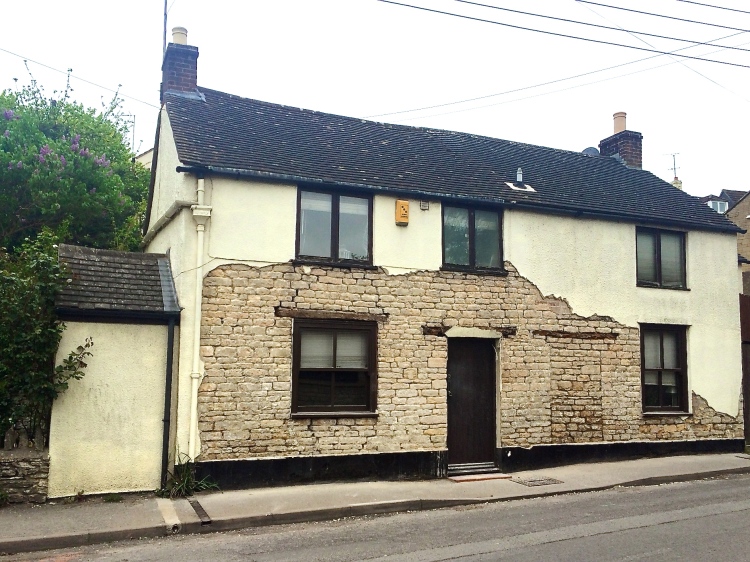
So, this is what the cottage looks like after the weekend.
What is immediately evident is that we have found an original doorway. This was a big surprise and extremely exciting, and we have two theories of what this could have been used for…
It is possible that this downstairs room may have been separated to use as a workshop for the clothiers/weavers who lived in the cottage. We think this may be a good call, as the room currently built above has only been added recently (within the last 30 years) this would mean that they would have had their own separate open fire and place to work.
The second theory is that it was originally two cottages, but with only one upstairs room we’re not 100% sure how this would have worked.
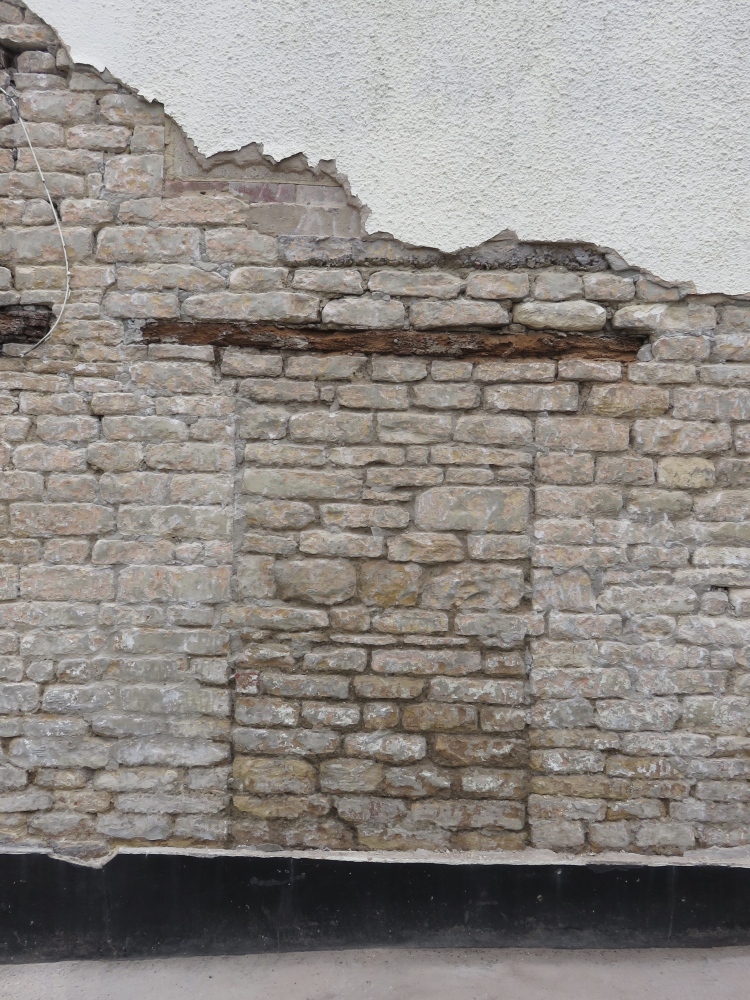
Either way, it’s always interesting to come across old features you had no idea were there. It’s also a little unfortunate in terms of the build. Like some stones elsewhere on the building, the stones that were used to block this doorway up are not in as good a condition as some of the others, and some are crumbling away. This is also the case under the windows where the stones have got damp. This means we’ll need to take areas out in sections and slowly re build them in new stone.
The cracks that we can see are caused by natural movement of the building. Lime mortar ( what the building was originally pointed with ) is soft, and lets the building freely move and breathe. It’s actually self repairing, so if the building does move, it will move with it to support the building, without creating cracks. Our cottage, like many others, was at some point re pointed with cement. This is because it was once believed it would help with damp, where it is so solid. This goes for many stone cottages now – you’re lucky if you come across one that hasn’t been!
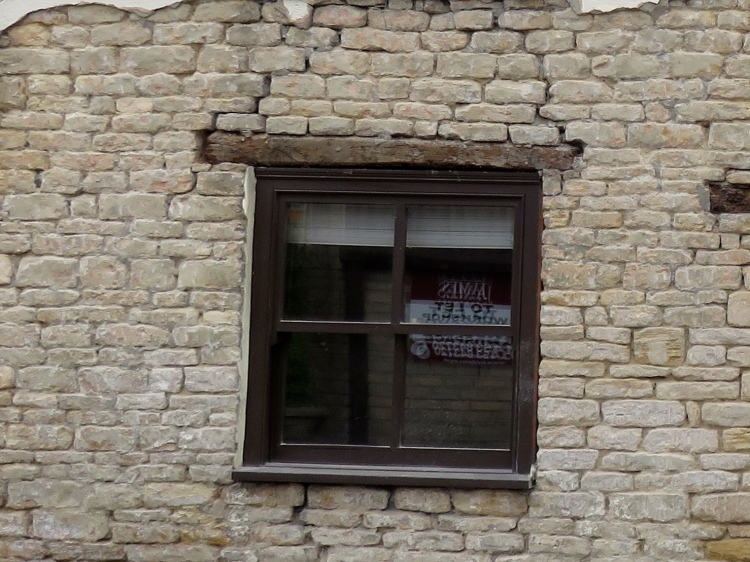
Like we said in an earlier post, cement mortars have closed pore structure, which traps water rather than allowing the building to breathe. Any trapped moisture will expand, and this causes the mortar to crack, often causing damage to the surrounding stonework in the process. This is exactly what has happened to our cottage. Above is one of the sections that will need re building.
Once we’d removed the bottom half of the render, we started trying to clean up the stones. This is extremely difficult and very time consuming, as the cement render leaves a fine layer of cement on the face of the stone.We must be extremely careful not to damage the stone faces too much, but also not to take out too much lime in between the stones when removing the cement mortar. Many of the stones are lose already, and we don’t want to make the building any weaker than it is already.
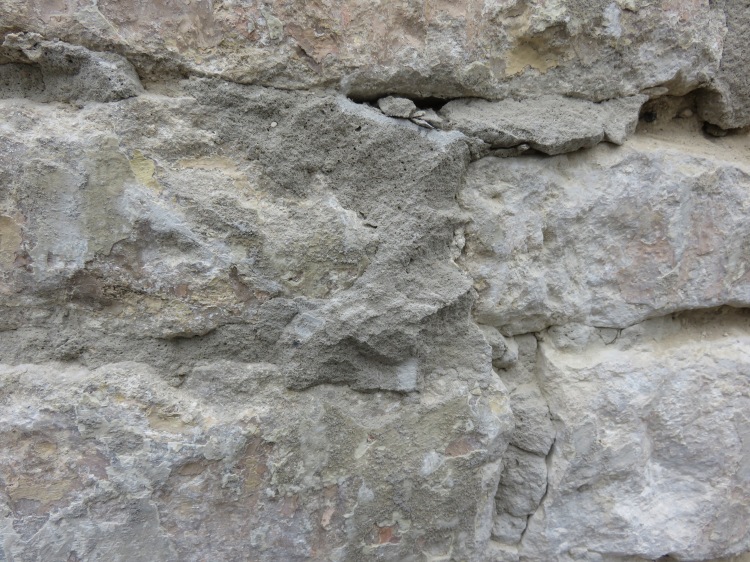
To say this takes a while is a massive understatement. We slowly cut out the cement mortar, and gently chip millimetres at a time off of the stone face ( image below) with a small cold chisel and hammer. I’m not sure if you can see from the image below, but there are also a few layers of paint underneath the cement which also need removing ( orange and yellow in colour).
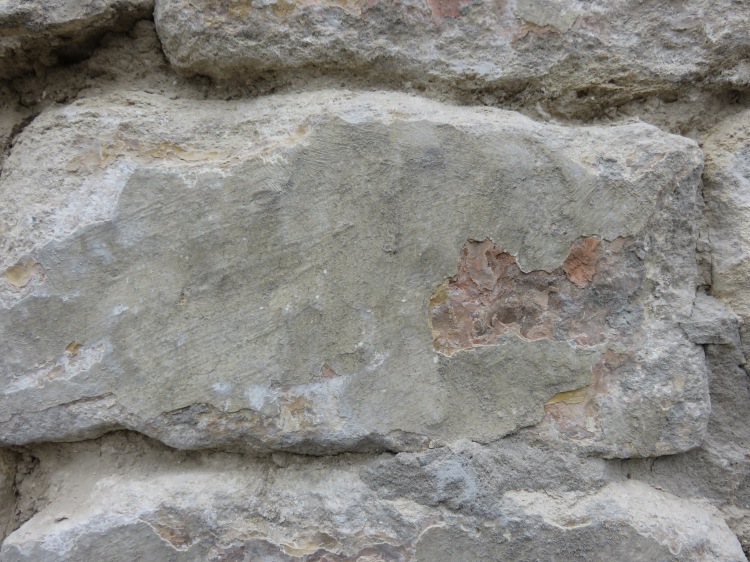
We found a process which seemed to work, which was: Remove any cement mortar surrounding the stone. Clean the stone with water to remove any dust. This also helps any small pieces of cement to appear more obviously. Chip off as much cement as possible. Brush vigorously with a wire brush. Scrape off any visible paint (the water helps to soften this). Remove any dust with a regular brush. Wet again and repeat until all materials are removed from the face.
It takes an extremely long time, but you are left with the stone looking like this :
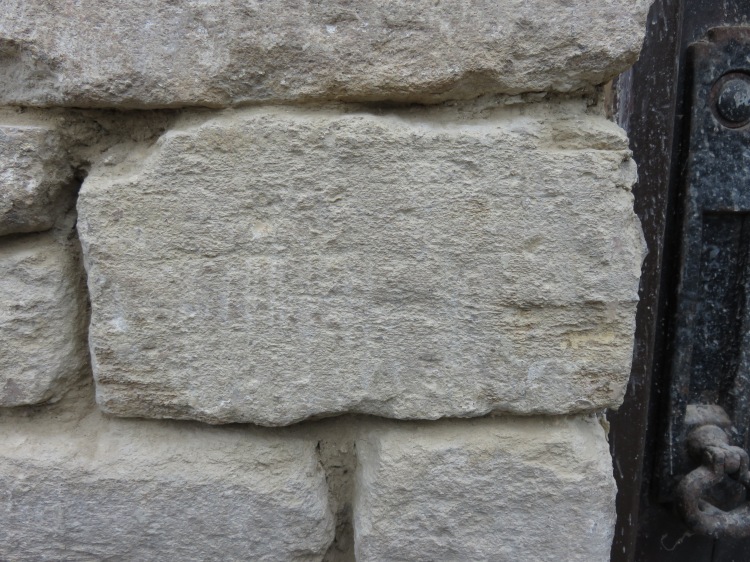
In comparison to the previous picture, this almost looks brand new, so although it’s so time consuming and physically tough, it’ll be worth it.
There are quicker ways of possibly achieving the same results.. The first would be to try a pressure washer. We are a little reluctant to try this though as the stones are very delicate and we would have to try and avoid the lime mortar. The second is to use a type of chemical. We may look into this further and test a small unseen section, but a lot of research is needed into this to make sure we don’t end up with an unforseen chemical reaction. The third is to sandblast the building. The main reason we wanted to stay away from this was the cost, but after uncovering more stone we are now worried that this may be too harsh on the stone and lime. It may be an option we look into later, depending on what the stone is like underneath the render at first floor level.
So over the next week we’ll keep going, taking it off by hand for the time being. It’s hard to tell from a photograph, but hopefully if you look at the right side of the original door, and then to the left, you will see the vertical section of stone and mortar that we cleaned yesterday.
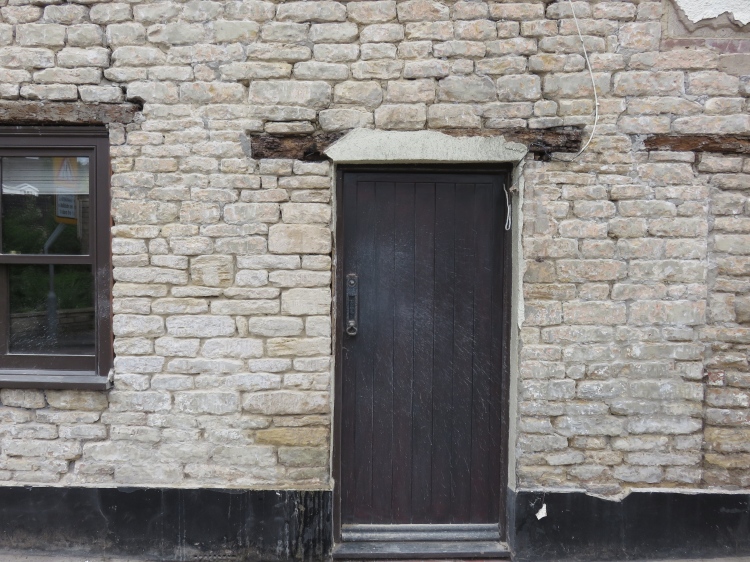
We’ll continue to do this during the week, and then we’ll remove the render at first floor level next weekend.
We hope you’ve enjoyed seeing our finds this weekend. More to come soon!

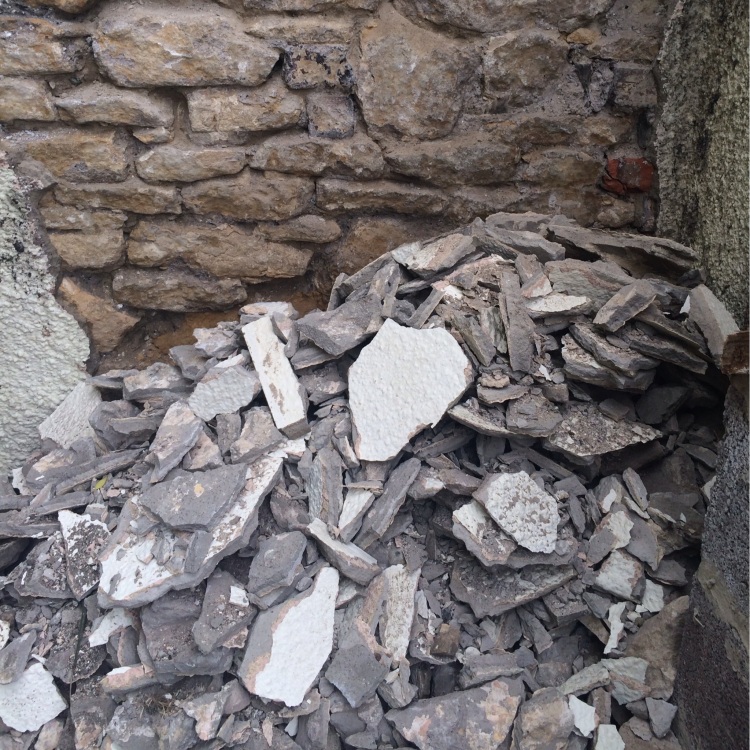
Wow!!! You have both been busy. It looks so good! You won’t want to sell it after all the hard work you’re putting in. Looking forward to seeing it tomorrow xxx😊😊
LikeLike
Thanks, no.. That’s what we said at the weekend. Look forward to seeing you tomorrow xxx
LikeLike
Might be a window above the hidden doorway, could have been 2 cottages at one time. It’s looking good
LikeLike
Yeah, possibly. We think that this side of the building was originally single story- as it’s been built on top of in block work. We’ll find out more when we come to take that down I guess! Thanks. Interesting to hear about your place in Devon too- good luck with it!
LikeLike